in order to give Crimson Desert a massive visual upgrade, you should use RenoDX and ReShade (Add-on Edition) to overhaul the game’s HDR and strip away annoying effects like Chromatic Aberration. This setup replaces the default tone mapping with a superior solution, providing a much cleaner, sharper image that finally lets your monitor’s peak brightness shine without the usual “color bleeding” or over-sharpening.
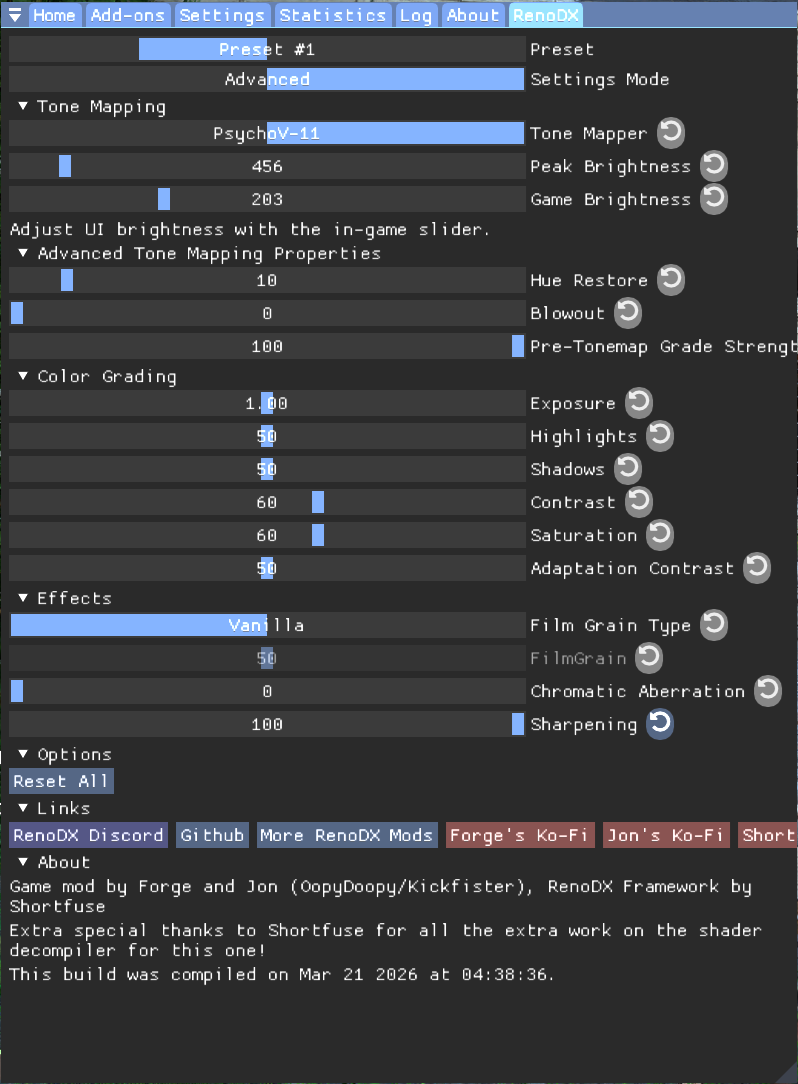
Setting it up is simple: install ReShade with Add-on support for the Crimson Desert executable and drop the .addon64 plugin into your bin64 folder. Once in-game, hit the [HOME] key, switch RenoDX to “Advanced” mode, and use the “Auto” peak brightness tool to sync the highlights perfectly with your display’s nits for a true next-gen experience.
Visual Overhaul Checklist
- Software: You must use the “Add-on Edition” of ReShade for the plugin to work.
- Clarity: Set Chromatic Aberration to 0 to remove that blurry, “smeared” look on edges.
- Calibration: Use an Exposure of 1.25 to keep the image bright and punchy like SDR while maintaining HDR detail.
- Performance: This mod has a negligible impact on FPS because it replaces existing shaders rather than adding new layers.
Crimson Desert Visual Overhaul: Ultimate HDR & Clarity Guide
Prerequisites & Tools
To achieve these results, we utilize ReShade with Add-on support. This allows for deep-level hooks into the game’s rendering pipeline that standard overlays cannot reach.
- Software: ReShade (Add-on Edition)
- Plugin: RenoDX Crimson Desert Mod (or the MediaFire Mirror)
Step-by-Step Installation
1. ReShade Setup
Install ReShade and point it to the Crimson Desert executable.
Important: You must select the version labeled “with Add-on support” during installation, otherwise the RenoDX plugin will not load.
2. Plugin Deployment
Locate your game’s installation directory and move the downloaded .addon64 file into the binary folder:
...\Steam\steamapps\common\Crimson Desert\bin64
3. In-Game Configuration
-
Launch the game and press the [HOME] key to open the ReShade overlay.
-
Navigate to the RenoDX tab.
-
Set the Settings Mode to Advanced.
Calibration & Optimization Strategies
To get the most out of your specific panel (OLED, Mini-LED, or IPS), follow these calibration guidelines:
| Setting | Recommended Value | Why? |
| Peak Brightness | Auto (Click Arrow) | Automatically syncs the game’s output to your monitor’s $Nits$ capability. |
| Exposure | 1.25 | Compensates for the mod’s internal tone mapping (adjust +/- 0.10 based on room lighting). |
| Chromatic Aberration | 0 (Disabled) | Removes the “color bleeding” effect on edges for a much sharper image. |
| Sharpening | User Preference | Disable if using DLSS/FSR sharpening; otherwise, keep low to avoid “halos.” |

Expert Tips for Best Results
- Windows HDR: Ensure HDR is toggled ON in your Windows Display Settings before launching the game.
- In-Game Brightness: Once RenoDX is active, it is often best to leave in-game brightness/contrast sliders at their default (50/Neutral) positions to avoid “clipping” the signal.
- Performance Impact: This mod has a negligible impact on FPS, as it replaces existing shaders rather than adding heavy new layers.
Last Updated on March 30, 2026

An avid listener of music from a number of countries. Writing is his hobby and passion. A follower of all the latest android and PC games. Not to mention his favorite: Mobile Legends!