Ever dreamed of being the hero between the posts, making game-winning saves in the thrilling soccer game, REMATCH? Whether you’re a seasoned soccer pro or new to the virtual pitch, mastering the art of goalkeeping can take your game to the next level. This guide, brought to you by a 10-year veteran goalkeeper (who spent a legendary 72 hours straight in REMATCH), will break down everything you need to know to become a save-making machine.
Why Real-Life Soccer Smarts Matter in REMATCH
You might be wondering, “Does my experience on the actual soccer field really help in a game?” The answer is a resounding YES! While pressing buttons is something you’ll learn in-game, real soccer intelligence is your secret weapon, especially in higher ranks.
Think about it:
- Team Play: Understanding how to work with your virtual teammates.
- Space Management: Knowing where to be to open up attacking opportunities or shut down opponent threats.
In field play, losing the ball might be a setback. But for a goalkeeper, losing the ball almost always means conceding a goal. This guide will help you minimize those costly mistakes!
Mastering the Basics: Game Controls (and Practice Mode!)
Before we dive into advanced tactics, make sure you’ve got the basics down. The creators of REMATCH have done a fantastic job with their in-game tutorials.
Pro Tip: Head straight to the practice mode! It’s the best place to get comfortable with the controls and understand how your goalkeeper moves.
The Art of Positioning: Where to Stand to Make the Save
Just like in real soccer, your position as a goalkeeper in REMATCH is crucial. You’ll need to constantly adjust based on where the opponent with the ball is attacking from.
Imagine your goal is your castle, and you’re the last line of defense!
Core Positioning Principles:
- When an opponent attacks, stand in your penalty box, facing them directly.
- If the attack shifts to a flank (side of the field) or semi-flank (between center and side), adjust your position accordingly.
Let’s look at some common scenarios:
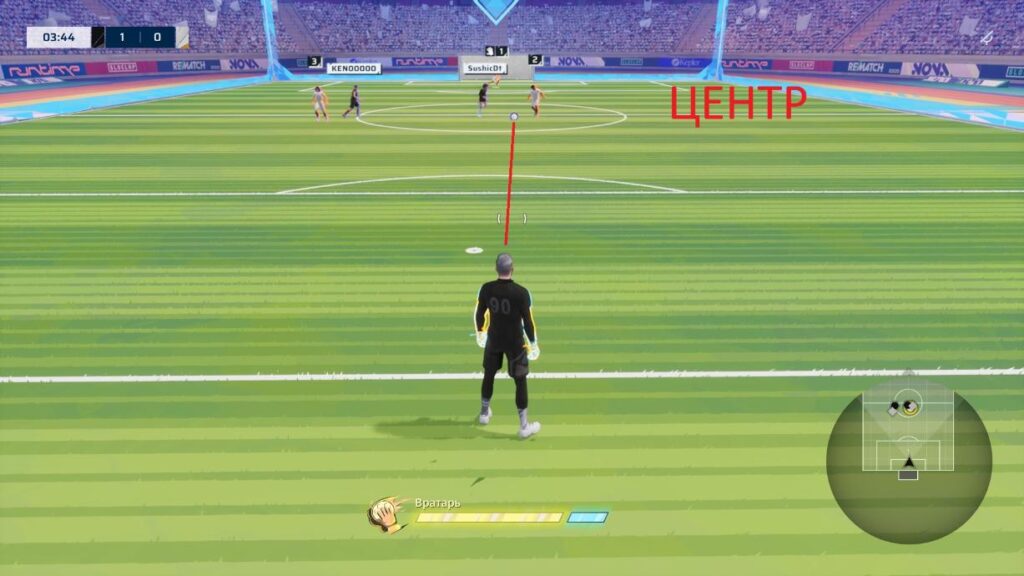
1. Opponent with the Ball in the Center: * Your goalkeepers position should be in the middle of the goal line.
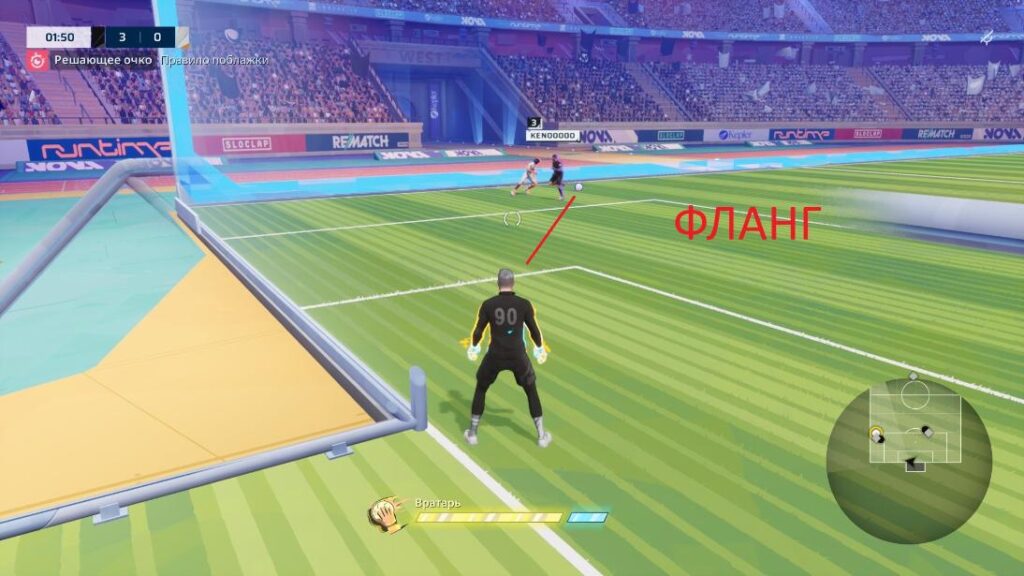
2. Opponent with the Ball on the Wing (Far Side): * Shift your position a bit towards the near post (the goalpost closest to the ball). Your goal is to cover the easy shot to the near corner.
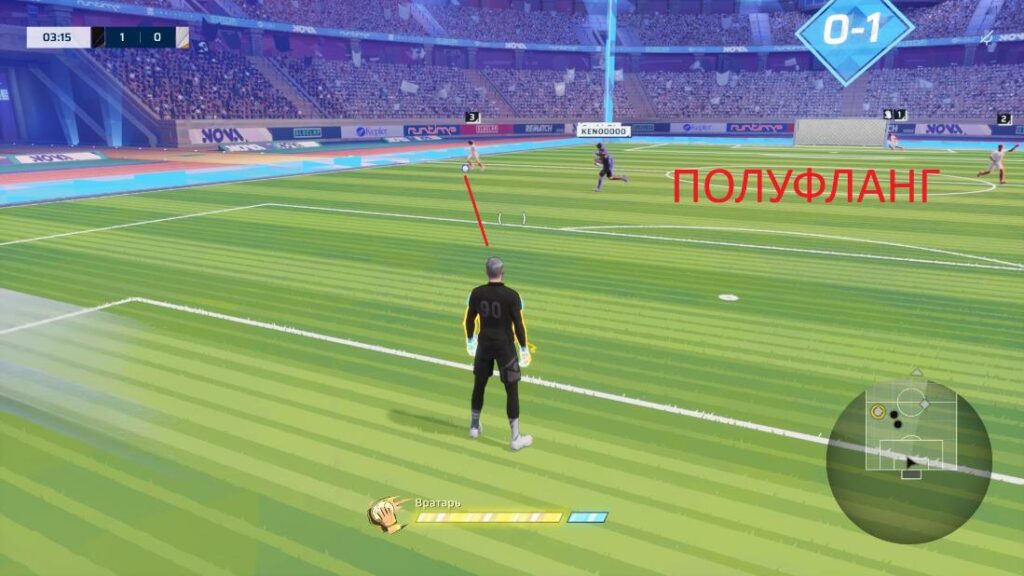
3. Opponent with the Ball on the Half Wing (Between Center and Side): * Position yourself slightly off-center, leaning towards the near post. This allows you to cut off the angle while still being ready for a shot to the far corner.
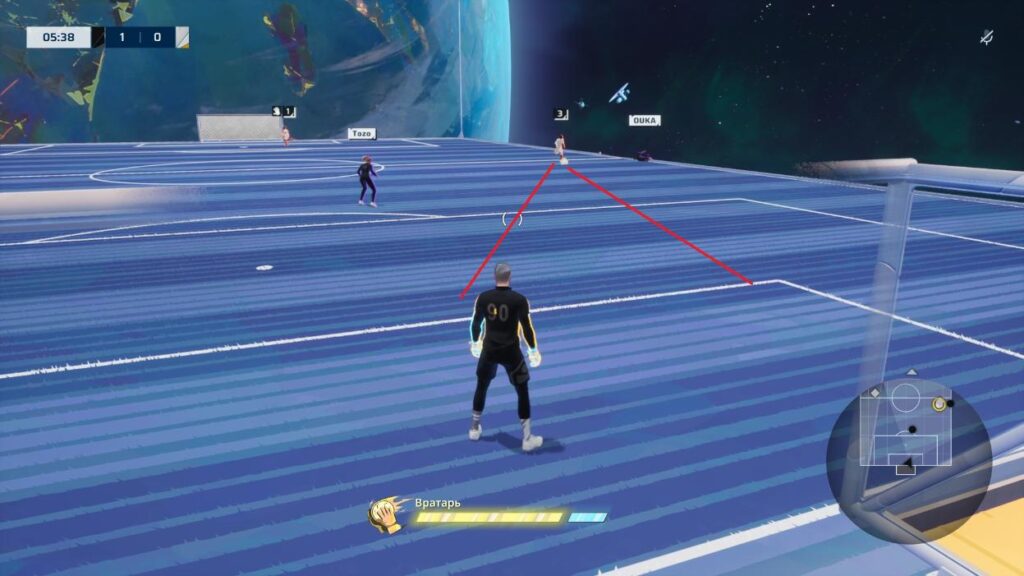
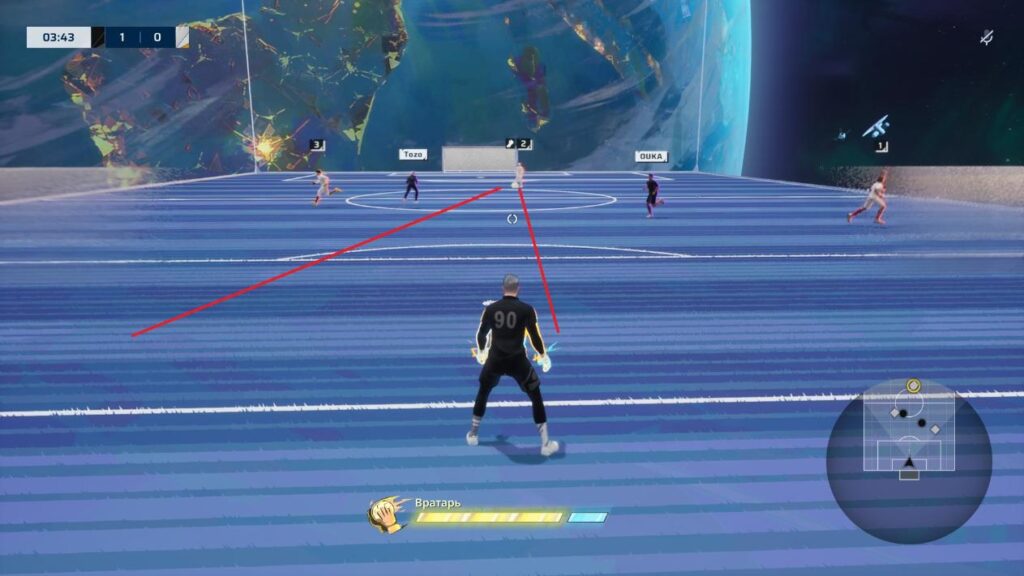
Understanding the “Goal Shooting Angle”: Your Goalkeeper Superpower
This is one of the most critical concepts for any goalkeeper. The “goal shooting angle” is the area from which an attacker can effectively shoot and score. Your job is to close this space as much as possible.
How to Determine the Angle:
- Ball Position: The closer the attacker is to your goal, the wider the angle of fire becomes.
- Goalkeeper Position: You should always try to be on an imaginary straight line between the ball and the center of your goal. This helps you cover the most ground.
- Coming Forward: If you move closer to the attacker (like in a one-on-one situation), you reduce their shooting angle. This forces them to make a quick decision or take a harder shot.
Good News: In REMATCH, if a shot comes directly at you, there’s often an “autosave”! However, your smart positioning based on the attacker’s distance and location is what truly sets you up for success.
The Two Axes of Goalkeeper Positioning: Width and Height
Let’s break down your positioning into two key axes:
1. Width Axis (Side-to-Side Positioning)
This axis covers your horizontal movement across the goal. There are three main positions:
- Center: Your standard position, right in the middle of your goal line.
- Half-Wing: Slightly off-center, a bit beyond the goal line, and closer to the near post.
- Wing: Right on the goal line, hugging the near post.
These positions are designed to automatically cover the easiest shots to the near corner, while also setting you up for saves to the far corner.
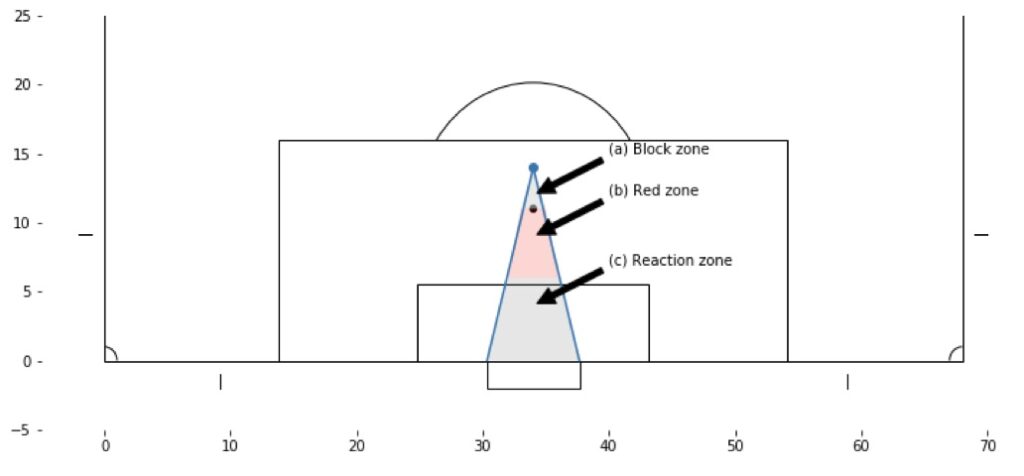
2. Height Axis (Distance from the Goal)
This axis determines how far you come off your goal line, based on the attacker’s distance. We’ll borrow some concepts from real soccer to adapt them for REMATCH:
- Blocking Zone (3 meters or less from the ball):
- If the attacker is this close, you can actively block their shot. This is where you might rush out to close them down.
- Reaction Zone (8 meters or more from the ball):
- When the attacker is far away, you have plenty of time to react and catch the ball.
- Red Zone (3 to 8 meters):
- This is the danger zone! In this range, you typically don’t have enough time to react and catch the ball, nor to effectively block a shot. If the attacker shoots from here, they have a huge advantage. Be extra vigilant!
Opponent Attack Strategies and How to Counter Them
Now that you understand positioning, let’s look at the types of shots you’ll face in REMATCH and how to handle them.
1. Basic Shot
This is your everyday shot from anywhere on the field. Your best defense here is to stick to the goalkeeper positioning principles we’ve already covered. Stay on your line, cover the angles, and be ready to react!
2. Cross from the Flank and Kick
This is trickier! A cross comes in from the side, and an attacker tries to score from it.
- The Challenge: Visibility can be tough, especially if opponents are blocking your view.
- Ideal Scenario: You’d have a defender marking the attacker to prevent the shot.
- What You Can Do (When Teammates Are MIA):
- Pray (just kidding, mostly!): Sometimes, it’s just a tough situation.
- Use Your Mini-Map: This is your best friend! Keep an eye on the mini-map to track the attacker’s position in your penalty box. Anticipate where the cross is going and adjust.
3. One-on-One Beat the Goalkeeper
This is when an attacker is clean through on goal, often in your penalty area. They might not just shoot; they could try to “chip” the ball over you (often called a “Rainbow” shot).
Here’s your plan:
- Exit to the Block Zone: Quickly move forward to be about 2-3 meters from the attacker.
- Cursor on the Player: Keep your cursor directly on the attacker.
- Maintain Width Axis: Stay in line with the goal.
Now, the attacker has a few options:
- Direct Shot (40% chance): An autosave might occur if it’s hit straight at you.
- Move to Red Zone (20% chance): They might try to dribble into that dangerous 3-8 meter range.
- Chip Shot / “Rainbow” (40% chance): This is where they try to lob the ball over you. You have a tiny window (about 0.5 seconds!) to press the “jump up for the ball” key. Practice this timing!
4. Pass Across the Board Over the Goal + Kick
This is a common “trick play” in REMATCH. Two attackers (or one passing to themselves) will send the ball high over the goal and then knock it into an empty net, often forcing your goalkeeper to go into a pointless save animation.
Here’s how to deal with it:
- Normal Position: If you’re in a good default position, just wait for the shot. Don’t react too early!
- Ball Going In: If you realize the ball is actually heading into the goal, then make the save.
- Bouncing Ball: If you see (or on the mini-map) that the ball is going to bounce in your goalkeeper’s area, move to the drop point and prepare to jump up for it.
Reflexes or Anticipation: Reading the Shot Direction
REMATCH is like a soccer shooter where players aim with a cursor. Over time, you’ll start to develop an uncanny ability to “read” where the striker’s cursor is pointing, and therefore, where they’ll shoot!
The Key Clue: Player Model Direction
- Model Faces Forward: When the striker’s model is generally facing forward, in the direction of their cursor, they’re typically aiming for a straight shot.
- Model Faces Flank (Side): If the player model is angled towards one of the side flanks, a potential shot is heading towards the near corner.
- Model Faces Opposite Flank: If the model is angled sharply towards the opposite flank, expect the shot to go towards the far corner.
This isn’t foolproof, especially with quick shots (which often happen in the blocking zone and can be more random). But as you play more, you’ll start to notice this pattern and use it to your advantage to anticipate the shot direction and make those incredible saves!
Conclusion: Become the Wall Your Team Needs!
I hope this guide has been super helpful and will drastically reduce those frustrating conceded goals in REMATCH! Remember, this advice comes from a decade of real-life soccer experience combined with countless hours in REMATCH’s beta and early access. Go out there, apply these strategies, and become the impenetrable wall your team needs to climb the ranks!
What’s the most challenging type of shot you face as a goalkeeper in REMATCH? Share your thoughts in the comments below!
Last Updated on June 23, 2025

An avid listener of music from a number of countries. Writing is his hobby and passion. A follower of all the latest android and PC games. Not to mention his favorite: Mobile Legends!