
Your success in Tiny Tina’s Wonderlands comes down to two things: picking the right class synergies and farming the right legendary drops to match your build. This guide covers the strongest class combinations in the current meta and exactly which bosses you need to farm for the game’s best dedicated loot.
Best Classes & Multiclass Customization
You select your primary class at the start of the game, which is permanent. At level 13, you unlock your secondary class (Multiclassing), which you can freely swap out after completing the main campaign.
If you are looking for the absolute strongest base classes to start your playthrough, here are the top picks:
1. Spellshot (Top Tier)
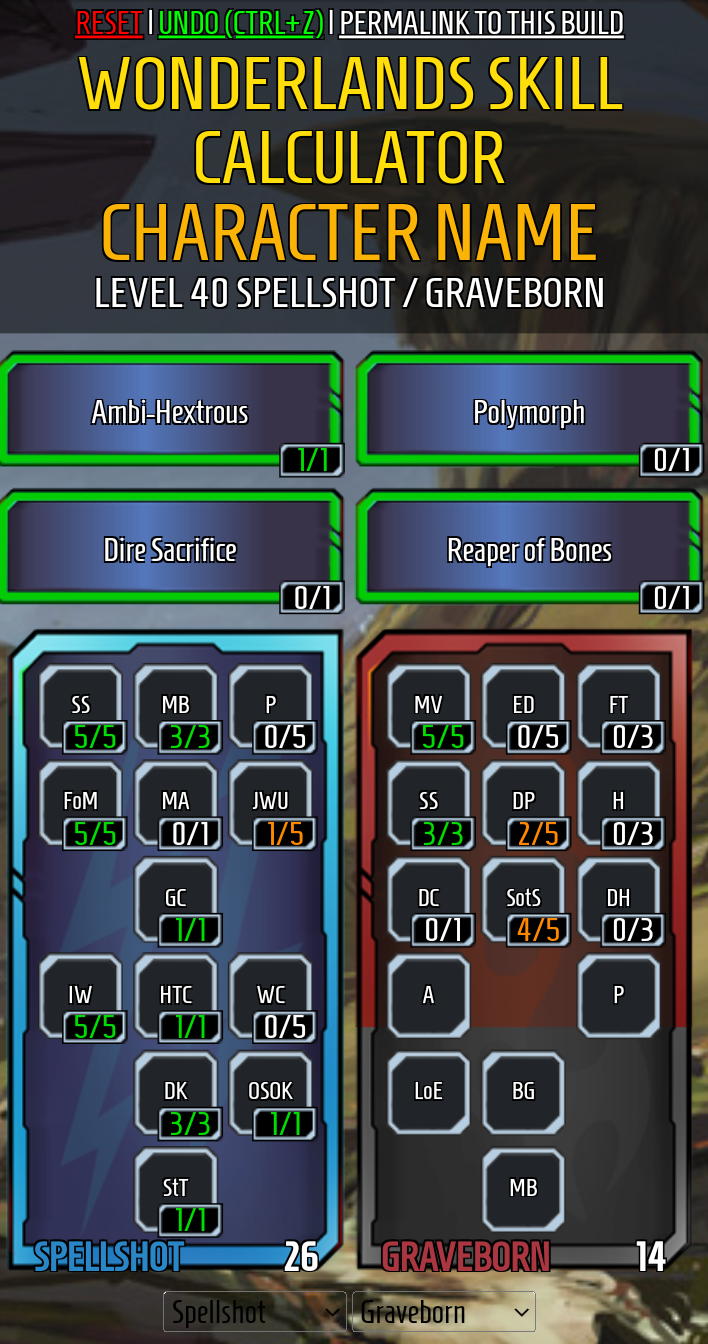
The Spellshot is the most broken class in the game for pure DPS. Their “Ambi-Hextrous” action skill lets you equip two spells at once instead of an action skill. Paired with their “Spellweaving” passive, you gain stacking spell damage and fire rate bonuses simply by reloading and casting.
- Best Multiclass Pairings: Graveborn (Deadshot build) or Stabbomancer (Trapscallion build).
2. Graveborn (Top Tier)
The Graveborn specializes in Dark Magic, meaning they sacrifice health to deal massive damage, but instantly heal it back via life steal. They are the ultimate survival class.
- Best Multiclass Pairings: Spellshot (Deadshot build) or Spore Warden (Morticulturalist pet build).
3. Spore Warden (A-Tier)
If you prefer traditional gunplay and a reliable pet to revive you when you go down, the Spore Warden is the best choice. Their Mushroom Companion taunts enemies, while their skill tree provides massive buffs to gun damage, magazine size, and critical hit chances.
- Best Multiclass Pairings: Brr-Zerker (Frostshivver build) or Graveborn.
Legendary Weapons & Melee Gear Locations
While you can get legendaries from the Chaos Chamber loot bunnies at the end of the game, farming a boss’s dedicated drop pool is much faster if you want a specific item. Here are the locations and effects for the game’s standout weapons.
Ruby’s Spite (Pistol)
Ruby’s Spite is a fast-firing pistol that shoots dark magic bolts. When you kill an enemy, it grants a massive fire-rate buff, and the projectiles automatically track targets for a short time.
- Item Type: Pistol
- Boss / Source: Monstrous Shroom
- Location: Weepwild Dankness (Obelisk encounter)
Masterwork Handbow (Pistol)
A callback to classic Jakobs revolvers. Landing a critical hit with the Masterwork Handbow automatically ricochets a bolt to a nearby enemy and returns a bullet directly to your magazine.
- Item Type: Pistol (Crossbow)
- Boss / Source: Captain Swallow
- Location: Tangledrift
Borea’s Breath (SMG)
This SMG shoots ice projectiles that travel in a horizontal, sweeping pattern. It excels at mobbing and freezing large groups of enemies at once.
- Item Type: SMG
- Boss / Source: Ribula
- Location: Snoring Valley
Cannonballer of Ardor (Heavy Weapon)
This ridiculous rocket launcher fires literal bouncing cannonballs. While the bounce makes it tricky for flying targets, it deals devastating splash damage in enclosed boss arenas.
- Item Type: Heavy (Rocket Launcher)
- Boss / Source: LeChance
- Location: Wargtooth Shallows
Goblin Pickaxe (Melee Weapon)
The Goblin Pickaxe is one of the most sought-after utility items. Every time you hit an enemy, it spawns gold dropped on the floor. More importantly, picking up gold increases your movement speed, spell cooldown, and action skill cooldown.
- Item Type: Melee
- Boss / Source: Pigwart
- Location: Mount Craw (Obelisk encounter)
- Pro Tip: You don’t even need a melee-focused build to use the Goblin Pickaxe. Equip it purely to hit a stray enemy between waves to trigger your cooldown buffs.

Legendary Wards (Shields)
Wards in Wonderlands do a lot more than just block damage. The right Ward will actively buff your DPS.
Cursed Wit
The Cursed Wit is the best Ward in the game for close-range builds. When the Ward is fully depleted, it grants a massive 100% bonus to damage dealt to nearby enemies, and a 17% damage reduction.
- Item Type: Ward
- Boss / Source: Ribula
- Location: Snoring Valley
Undead Pact
This is a highly defensive Ward tied to Dark Magic. When your Ward breaks, it sends out a nova that deals Dark Magic damage and heals you based on the damage dealt to surrounding enemies.
- Item Type: Ward
- Boss / Source: Zomboss
- Location: Shattergrave Barrow
Last Gasp
Ideal for gun-focused builds, the Last Gasp restores your ammo while it is depleted. If you have an SMG or Assault Rifle that chews through bullets, purposefully breaking this shield gives you infinite sustain.
- Item Type: Ward
- Boss / Source: Zomboss
- Location: Shattergrave Barrow
Last Updated on July 19, 2026

A computer science graduate by qualification, Zoid loves to keep himself updated with the latest gaming content related to PC, Android, and other platforms as well. Likes to keep his diet and health in check from time to time!