We will discuss every puzzle, hidden collectible, and combat encounter in the following guide of the Presage Mission in Destiny 2. Note that this is post Lightfall so some things have changed in the Presage mission so this post is updated to our best knowledge.
Destiny 2: Presage Mission Guide (Updated)
Dead Man’s Tale Exotic in Destiny 2 has its unique mission, much like Hawkmoon’s Harbinger mission. Presage takes players through an eerie Cabal ship close to the Tangled Shore. Players can complete Presage once per week for a Dead Man’s Tale that is rolled at random.
What Has Changed in Lightfall?
Presage has come back in Season of the Witch via the Exotic Mission playlist in the “Legends” tab. The mechanics of Presage are identical to those of Beyond Light’s version.
The rooms, puzzles, and combat encounters have all remained unchanged. The main significant contrasts are the accompanying:

- There could be no longer collectibles on board the Glykon.
- Readable sections have likewise been taken out.
- Osiris and Caiatl will discuss the Crown of Sorrow if you stroll into the room. This room is currently open naturally.
- Finishing this action grants a craftable Dead Man’s Tale and characteristic overhauls for that weapon.
- Weapons from Season of the Haunted can also drop.
- The Egregore Link buff endures between rooms currently, making it conceivable to sidestep a few riddles that beforehand were impossible.
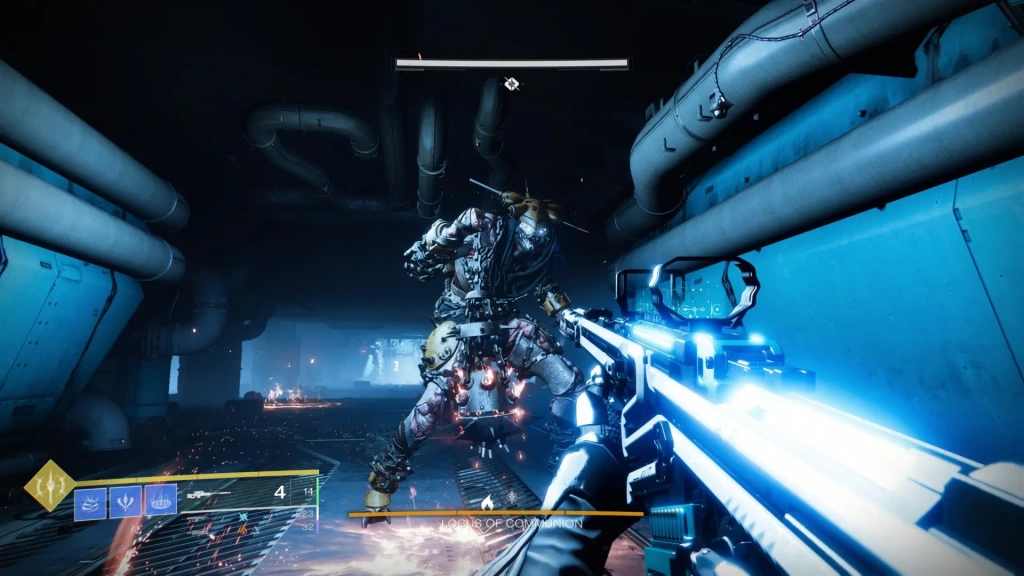
- A partitioned health bar has been added to the boss of Locus of Communion to indicate better when DPS phases end.
- Legend difficulty currently has a 30-minute time limit of 25 minutes.
- Legend difficulty no longer features champions.
The center of this mission hasn’t been changed by any means. The boss of Locus of Communion has not been altered in any way, and Legend Difficulty maintains the same layout as Normal.
What are the differences in the Legend Version?
Presage has a Legend Variant that players can finish, giving Dead Man’s Tale two intrinsic upgrades when you complete it.
Be careful that this mission is timebound, entrusting your fireteam with finishing the whole mission, beginning to end, shortly. If you stay longer than 30 minutes, the mission must be restarted, and you are immediately returned to orbit.
Here are the modifiers attached to Legend trouble:
| Presage Modifiers | |
| Surges | Arc and Strand |
| Overcharge | Scout Rifle |
| Threat | Void |
| Shield | Arc, Solar, and Void |
| Legendary Difficulty | |
| Power Limit | The maximum effective Power Level is 1,815 (-15 delta). |
| Equipment Locked | You cannot change your equipped loadout after the activity begins. |
| Scorched Earth | Enemies will hurl grenades more often. |
| Time Limit | After getting on the Glykon, you have 30 minutes to complete the mission. |
Unlike earlier Exotic Missions like Zero Hour, the Legend variant does not alter the Glykon’s layout or any of the game’s mechanics. You’ll go through similar labyrinths, same adversary gatherings, and battle similar managers with similar mechanics.
So, Power bracing is available in the Legend variation. Your foes will always be 15 Power above you, so damage inflicted on you will be significantly higher, and outgoing damage will decrease.
Getting inside the Glykon
Upon spawning, you will be at the Glykon’s loading ramp. The primary entryway is locked, so you must get in from the side.
Jump onto the ship’s platforms after turning left. Turn around or look further along the ship whenever you come to a dead end.
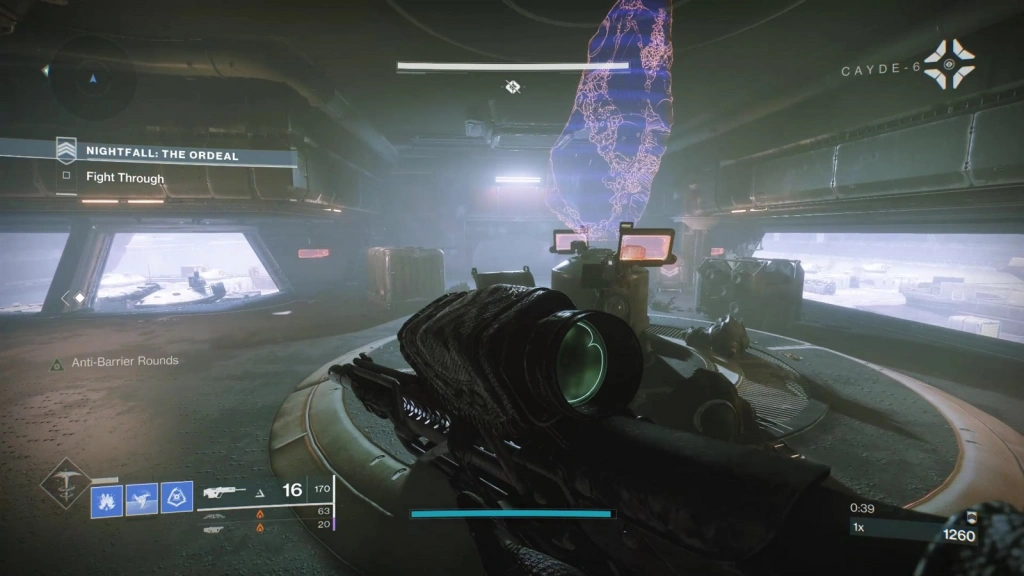
When you enter, several grates will obstruct your path. You can obliterate these meshes by taking shots at them. Proceed with the way until you arrive at a vast, open room.
This room has an enormous Cabal entryway that can be opened by cooperating with a switch to one side of the entryway. If you pivot, you’ll see a room shrouded in Darkness greenery, a mist entryway, and a bunch of spores close to the haze.
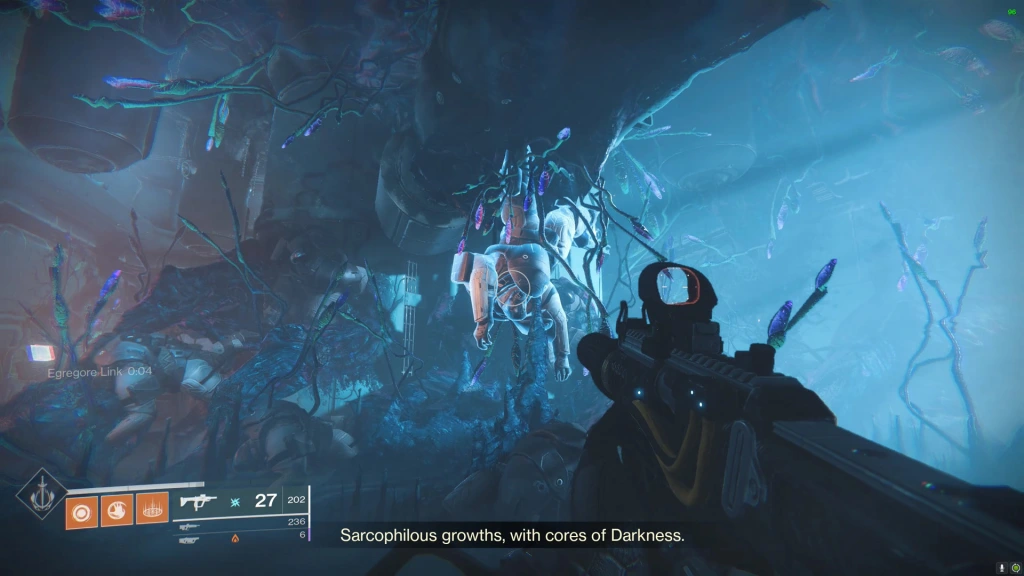
Popping Spores
Close to the unusually Dark haze door will be a group of spores. To cross the door, you should remain close to the spores and harm them.
You will receive the Egregore Link buff for 15 seconds from this. You can get through these bizarre Darkness fog gates if you’re active.
To advance, make a beeline for the upper left corner of the room. Break the vent, then continue forward. Jump up the vent when the path ends to move on. You will enter a massive electrical room at the path’s end.
Electric Room
At the point when you drop down, go to one side and go on into the room. Scorn Screebs will charge you. Try to stay away from them because they’re pretty tanky.
A switch at the end of the path will open a door full of Egregore Spores near where you started. Break the spores, then cross the hole.
Once you cross the fog, more Screebs will leap at you. When crushed, you should cross one extra hole in the electric room. You will find an electrical circuit uncovered in a red cylinder. Annihilate this wire by harming it. This will open the adjacent hatch.
To fight more Screebs, descend the hatch. A very much-positioned explosive ought to deal with a large portion of them.
Push forward somewhat, turn right, and hop up the stage right over the Screebs you recently killed. There will be a switch close to the wall.
Flip it, then race to the far edge of the room. This will prompt one more hole in the electric room.
Switch on the opposite platform by crossing it, then double back to where you came from. Drop down to the lower floor, pivot, then, at that point, shift focus over to the wall to your left side to find a recently opened hatch with a circuit you can break.
Run back to the electric room gap you just left after destroying it. Land on the stage beneath and guarantee your weapons are all reloaded. At the point when prepared, run down the trash chute. To stop falling, be ready to jump.
Garbage Compactor
Players have to demolish three fuses that are protected by ground vents. Obliterating each of the three circuits will uncover an exit on the floor, signified by red lights. As this occurs, the room at both ends will enclose you, and Screebs will fall from the ceiling to blow you up.
Interact with the switch at the room’s end to begin the encounter. Concentrate on the vents that are nearest to the compactor’s walls.
Crack open any vents with a gleam close to the middle, as these have the wires you’re searching for. Once all three have been destroyed, drop down the red lights-lit hatch to enter the subsequent encounter.
You only respawn over the chute if you bite the dust during this experience. You can restart this part with no result. Screebs are not respawned.
Scorn Combat Encounters
The list of first Encounters Enemies includes Chieftains, Ravagers, Stalkers, Raiders, and Screebs. As you descend into the next room, waves of Scorn will begin to appear.
Keep a safe distance from this conflict; Most enemies are Ravagers. Take out the Marauder expert riflemen in the back first, then, at that point, kill any charging Ravagers.
Dispense with the Tribal leaders next, then, at that point, tidy up the other adversaries. Move on to the next room for a much more challenging encounter.
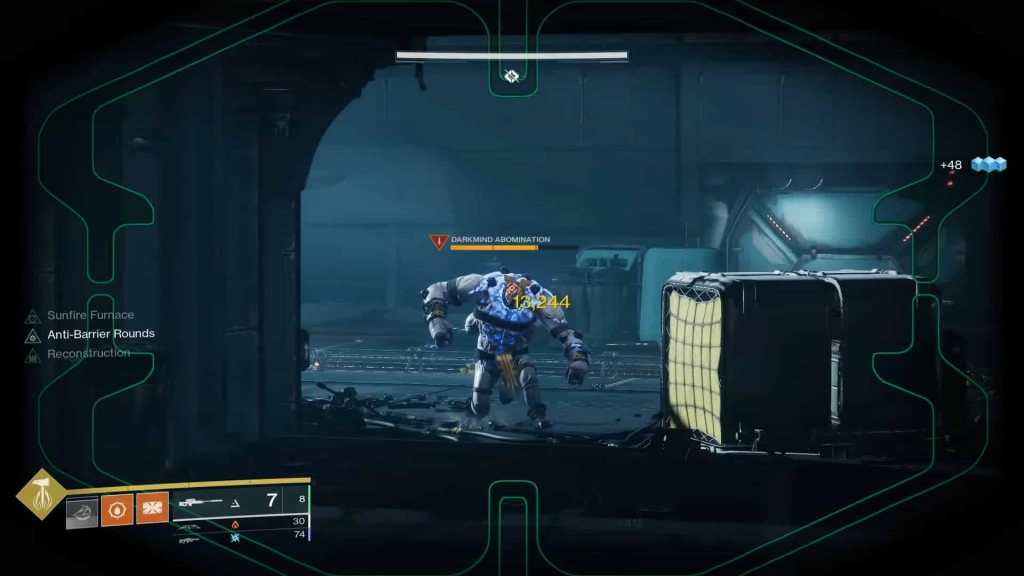
The enemies in your Second Experience include Two Abomination Bosses, Chieftans, Ravagers, Stalkers, Bandits, and Prowlers.
Two Abominations will pelt decimating lightning assaults at you during this battle. Stay behind the cover to avoid being shot at.
Pillager expert sharpshooters will likewise prowl on the second-story stage, disregarding the region. Get rid of them as soon as you can.
During this fight, many Ravagers will swarm you, in addition to the enemies with ranged attacks. Pull them from any Chieftains before confronting them. Kill the Ravager waves, then center around overcoming the Chieftains.
When most of the Scorn are dead, center around one of the Abominations. They are irrationally tanky, so go ahead and empty your Heavy weapon or Super into them. Assuming you take excessively long to kill an Abomination, Screebs will intermittently generate to apply pressure.
A second wave of Scorn will appear after the death of one Abomination. Screebs will be necessary for this wave, so attempt to avoid adversaries. Kill the melee enemies first, just like before.
Rout the majority of the Scorn, then center all of your capability around the subsequent Plague. Killing all the Scorn in the shelter closes the experience.
Look for a platform to the right of the second hangar door to exit the hangar. To reach the second hangar bay, jump across the exterior platforms and onto the nearby Cabal ship.
You ought to see an air vent close to the back-left corner of the room. The final maze in Presage can be reached by going through the vent.
Maze
As you enter this room, turn around quickly to track down a switch next to a Cabal entryway. A cluster of spores will be seen by this. Break the spores, then race to the right half of the space to cross a haze entryway.
After breaking the main Egregore bunch of this segment, book it to the nearby room and run directly past the Screebs, moving up to go through the Egregore wall on the upper floor. Going through this wall with the 15-second clock is feasible, permitting you to avoid the switch puzzle altogether.
A small group of Screebs will inhabit this brand-new space. Explode them before proceeding. Another switch that you can pull is at the room’s end.
Straightforwardly opposite the switch will uncover an entryway with a circuit. This fuse, in contrast to others, is timed. You have five seconds to react once it is broken.
Jump to the platforms above you after severing the fuse (the electric grid protecting you will dissipate). A switch can be found on one side of the stage. Follow the left corridor once the lever is pulled to find a second switch.
A spore cluster was opened by all of those switches next to the timed fuse you blew up. Race to the spores, get the buff, then, at that point, run towards the finish of the room where the Screebs came from. Bounce up the stage to one side, then, at that point, proceed with the way to arrive at another room.
Maze: Section Two
More Scorn can be found here, this time including grain adversaries. Get them out. A switch opens the door below you at the end of this room. Kill the Cabal turret guarding the room by turning right and falling.
A fuse that you can blow is located to the right of the turret. Obliterate it to uncover a spore group, this time opposite the entry to this room. Run to the room’s end to open the fog gate after breaking the spores.
Right now, you’re in a red-lit maze. Luckily, this labyrinth is exceptionally simple to explore. The spore cluster can be accessed by separating the panels shown above. The meshes opposite the spores are where you want to go.
Push forward after breaking that grate until you reach a grate intersection. When given different bearings, consistently head left until you kill a solitary Screeb, then, at that point, head right. If you move quickly enough, this will lead you out of the maze.
You’re heading on the correct path if you find a Screeb in a sufficiently bright passage. If you don’t move quickly enough, you might have to return to the spore cluster near the beginning of the maze.

Platforming Segment
There’s another part before you arrive at the last chief. You can stand on the vertical platforms by rotating them by jumping toward them.
Follow the way to arrive at the room’s finish, uncovering a couple of Contempt Plunderers en route. On the off chance that the Raiders are giving you inconvenience, kill them from a distance.
A switch will be located in the far right corner of the room. Run back to where you came from after pulling it. As you drop down to a red line, focus on the middle wall in the space to find a circuit you can break.
Return to the beginning and pop the spores before reaching the second spore cluster midway through this platforming room (as depicted above). Push toward the Darkness fog gate at the room’s right end after refreshing your buff.
Right now, convey a Raid Banner to load up on ammunition. At the point when you’re prepared, break the spore group toward the finish of the space to go into the last supervisor room.
Locus of Communion Boss
The enemies here are Locus of Communion, Chieftans, Stalkers, Lurkers, and Screebs.
The Locus of Fellowship is equivalent to Forsaken’s Hangman Chief. For those new, this is a manager Ravager foe that raises mainstays of fire with his gigantic censer.
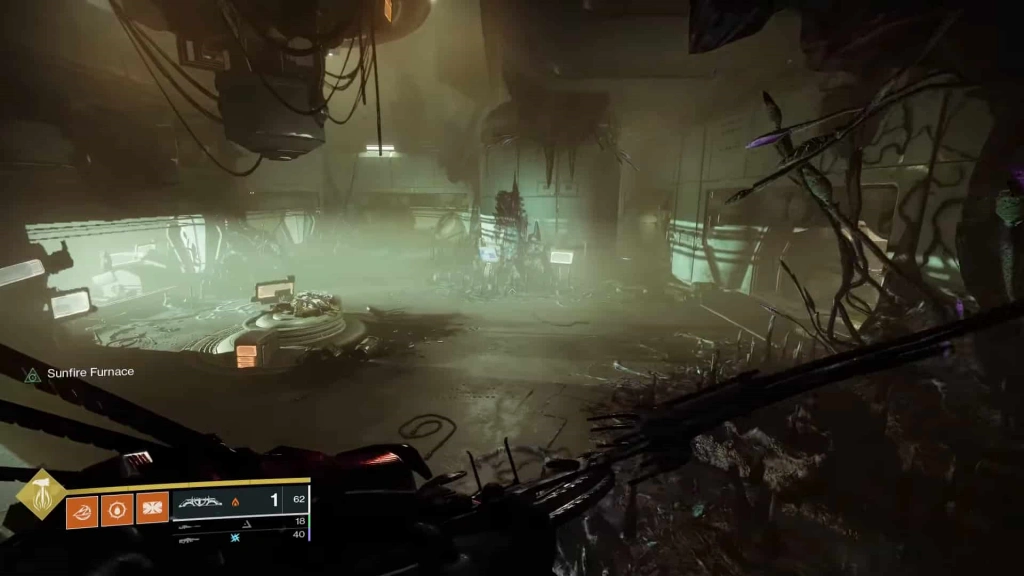
The boss will appear at the beginning of the encounter and rush you. A couple of shots will make him vanish, escaping to the heater beneath you. Scorn waves will also appear. If you want to avoid being killed, consider using your Super.
Since the supervisor is in a heater, remaining in it will kill you. To turn off the furnace, you must activate three panels, allowing you to damage the boss without risking death.
They can be actuated in any request, even though enacting the subsequent one final is suggested. This specific board consumes you while you’re in the room, so rush to pass it.
A message that reads “Coolant Flush [number] Initiated” will appear on each panel. With every one of the three boards actuated, hurry to any finish of the space to drop down into the heater.
The Locus of Communion is a forceful chief, charging you savagely while bombing his censer around. Slow him down with Stasis or any other crowd-control ability.
During this phase, try to remain distant and deal him damage with heavy weapons. Witherhoard and Anarchy are excellent here.
On the other hand, you can go totally in all-out attack mode and barrel-stuff him with a Shotgun. If you can close the gap, the Fourth Horseman is fantastic against this boss.
After the Locus takes a little piece of harm, he’ll bring forth an influx of Scorn. Prioritize eliminating the Chieftans and then the remainder. Take note that even after you complete a damage phase, these enemies do not disappear.
Harm the supervisor until he loses a lump of well-being (around 33% per bar). This will reignite the heater, showing a message expressing “Boiler Room Temperature Critical.” You have about five seconds to arrive at the upper floor before you begin taking harm.
Approach the surface, kill the Disdain ads above, and repeat what you recently did. To kill the boss, perform this three times. When the supervisor is crushed, follow the waypoint on your HUD to recover Dead Man’s Tale.
What are the Rewards for Presage in Destiny 2
Dead Man’s Tale, an exotic 120 RPM Scout Rifle fashioned as an old-fashioned level-action rifle, will be your reward for completing the Presage Exotic Mission. With every headshot you land, its Exotic perk, Cranial Spike, increases its damage output and reload speed.
The gun transforms into a 180 RPM Scout Rifle when hip-fired at five stacks. This firearm is completely craftable and has a unique pool of qualities.
Like Revision Zero, Dead Man’s Tale has numerous characteristic overhauls you can introduce, each polishing the firearm’s base details.
Characteristic redesigns are gotten after each Presage is finished. Legend variants grant two upgrades, whereas normal clears grant one intrinsic upgrade. There are four ways to upgrade the game’s core mechanics in Dead Man’s Tale.
Season 17 Weapon Pool
The reissued Opulence weapons sent off with Season of the Haunted are not reachable from Presage. Just the new weapons added that Season is in Presage’s drop pool.
One Season of the Haunted weapon is also dropped when a Presage clears. Not a similar season Foretell sent off with, yet these weapons are Leviathan-themed and completely craftable. The following is a list of all six weapons that can drop:
| Weapon | Archetype |
| Bump in the Night | Type: Rocket Launcher (25 RPM)
Damage: Stasis |
| Firefright | Type: Auto Rifle (450 RPM)
Damage: Kinetic |
| Hollow Denial | Type: Trace Rifle (1,000 RPM)
Damage: Void |
| Nezarec’s Whisper | Type: Glaive (55 RPM)
Damage: Arc |
| Tears of Contrition | Class: Scout Rifle (180 RPM)
Damage: Kinetic |
| Without Remorse | Type: Shotgun (80 RPM)
Damage: Solar |
Thus, that is all the information players will need regarding the Presage mission guide. You can go through the mission well with this and complete it.
Last Updated on January 7, 2024

A FIFA junkie who can also mix it up with Call Of Duty and racing games. GTA was his first love. Now can be found spending time between writing on what he plays and playing what he will write on.