This guide serves as a starting point for your journey into using the Map Editor. Please note that we won’t dive into the specifics of adding buildings, roads, or other elements. Instead, this guide aims to provide you with a basic understanding of its usage.
Using The Map Editor In Infection Free Zone – Full Guide

Ensuring Playability
As the title suggests, ensure that the zone or area you intend to edit is playable and accessible for gameplay (there’s no need to actually play through it; just confirm that the game will run).
After identifying the desired area, start a new game, skip the tutorial, and launch the game as usual. Once in-game, whether you’ve skipped or watched the introductory video, exit the game and proceed to the next step outlined in this guide.
Accessing the Map Editor
Once you’ve completed the tasks outlined in Step 1, it’s time to navigate to the Map Editor. If you haven’t already, download the Map Editor by accessing your Steam Library. Navigate to “tools” and search for “Infection Free Zone Map Editor.”
Download it and return to this guide. Upon opening the Map Editor, you should see the zone loaded inside the interface. Select the city you played in and allow the Map Editor to begin loading it. Once this is done, proceed to the next step as indicated in the guide.
Navigating the Map Editor
Congratulations, you’re halfway through! Welcome to Step 3. Now that you’ve pinpointed your location within the Map Editor, it’s time to start incorporating buildings, roads, and anything else the editor offers.
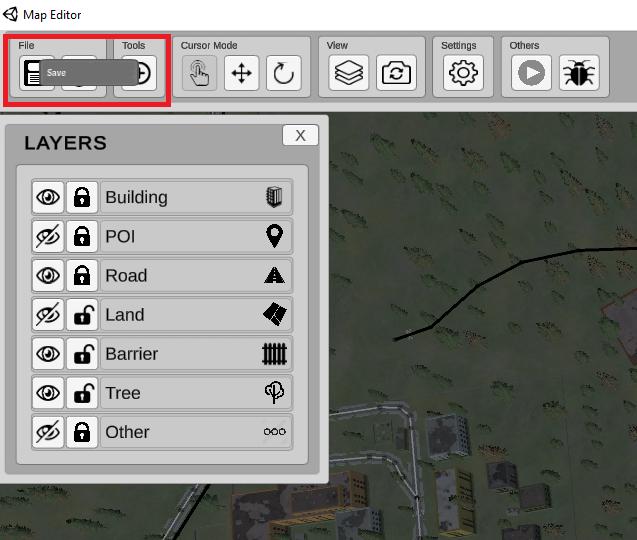
To add elements, simply click on the Tool button. However, I’ll let you explore that on your own. Once you’re finished editing or simply experimenting with the editor, you can save your work by clicking the small icon in the “File” section.
I recommend saving your progress before attempting to publish your custom map on Steam. If you prefer not to share your creation, simply click “Save File,” and then you can close the editor. Now, let’s move on to Step 4.
Testing Your Creation
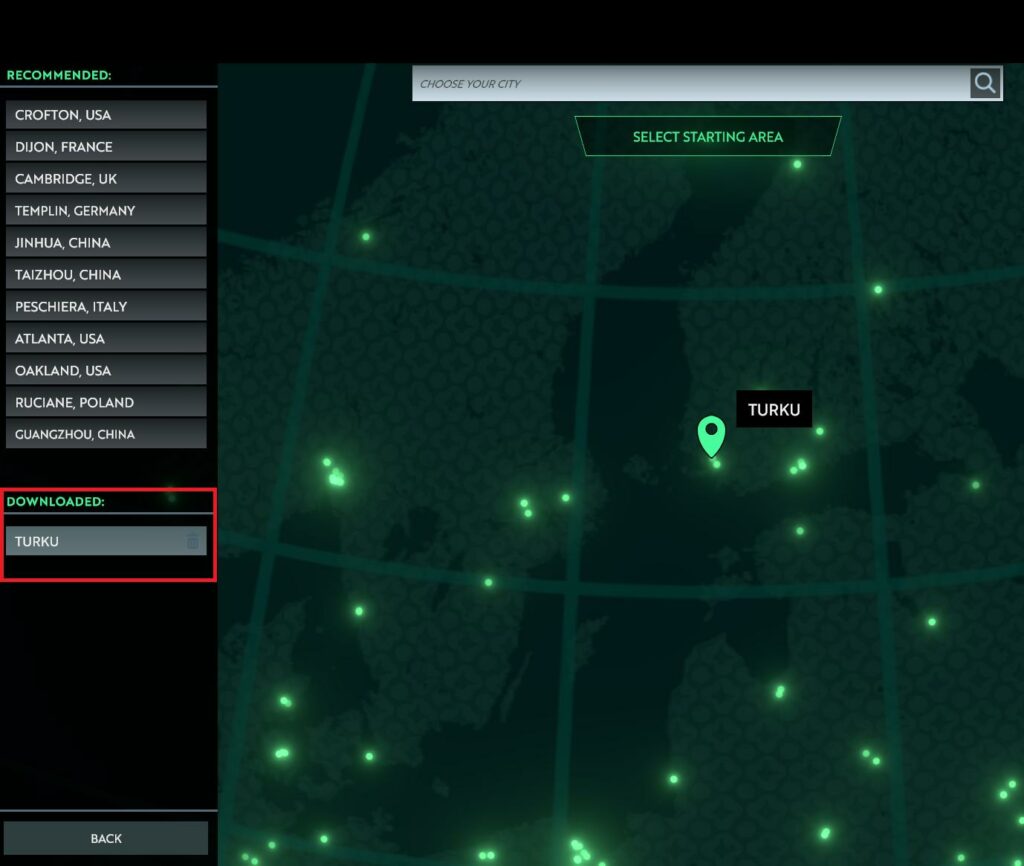
Welcome to Step 4, let’s dive in. So, you’ve saved your file after making a few tweaks to the map, right? Great! Now, let’s launch the main game and open it up. Once you’re in the game, go ahead and click on “New Game.”
Your edited location should now be visible under the “Downloaded” section. Select it, and enjoy playing your customized or modded map.
Sharing Your Map & Playing Others’
If you want to share your map, here’s how to do it: Right next to the “Save File” option, you’ll find “Publish to Steam.” Click on this, name your map, and after a short while, it will be uploaded to the Infection Free Zone Community for everyone to enjoy.
Now, how do you play other people’s maps? First, you need to subscribe to their workshop item. Once you’ve done that, open the Map Editor. Once it’s fully open, you’ll see the workshop section.
Once you’ve located the workshop map you downloaded, open it up inside the Map Editor and let it download the map for you. After this, save your progress within the Map Editor, close it, and open Infection Free Zone.
Now, follow the same steps as before: Go to “New Game,” and the downloaded map should be in the Downloaded section. Click on it, and the game will take you to the location, allowing you to start playing the custom-made map.
Thanks for reading! It’s true that this guide may need updates over time as technology and platforms evolve. Your understanding of the basics of downloading, creating, and sharing work is a great starting point for navigating through any changes that may come. If you ever need assistance with updates, feel free to ask!
Last Updated on April 26, 2024

An avid listener of music from a number of countries. Writing is his hobby and passion. A follower of all the latest android and PC games. Not to mention his favorite: Mobile Legends!