Whether you are a seasoned veteran looking for a new community or a server administrator trying to grow your player base, the Windrose Server List is your central hub. Finding the right community can be the difference between a frustrating experience and an unforgettable adventure.
The Windrose Server List is the central directory designed to connect players with the perfect game communities. Whether you are hunting for a new world or recruiting for your own, this platform simplifies the process through transparency and ease of use.
Key Highlights:
- For Players: Easily find servers using filters for Region, Language, Playstyle (PvP/PvE), and Verification status. Once you find a match, use the unique Invite Code to join instantly.
- For Server Admins: Create a free account to list your server, manage real-time details, and reach a wider audience of players.
- Community Driven: Includes a Voting system to boost popular servers and a Reporting tool to flag expired codes or misleading descriptions, ensuring the list stays accurate and high-quality.
How to Use the Windrose Server List: A Step-by-Step Guide for Players & Admins
This guide will walk you through everything you need to know to navigate windrose-serverlist.net, from creating your first account to listing and reporting servers.
What is the Windrose Server List?
The Windrose Server List is a dedicated platform designed to bridge the gap between players and server owners. It serves as a public directory where transparency and ease of access are the top priorities.
As a player, you can:
- Browse and filter public servers by region and playstyle.
- View real-time player capacity and detailed server descriptions.
- Vote for your favorite communities to help them grow.
As a server owner, you can:
- Gain visibility by listing your server in a centralized location.
- Manage and update your server details in real-time.
- Attract players who match your specific server language and mode.

Navigating the Platform
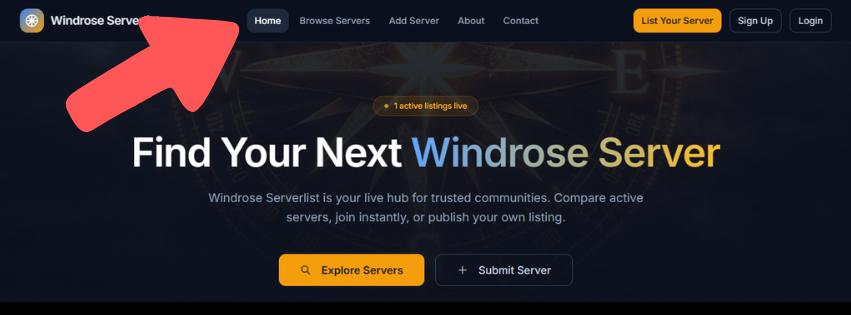
The website is designed with a “user-first” philosophy. Upon arriving at the homepage, your primary tool is the Top Navigation Bar.
This bar acts as your command center, allowing you to jump between browsing the list, adding a new server, or accessing your personal dashboard. Because this bar is persistent across all pages, you never have to worry about getting lost while searching for a specific feature.
Getting Started: Creating Your Account
While anyone can browse the listings, you will need a registered account to unlock the full potential of the site—specifically if you intend to host or manage a listing.
The Sign-Up Process:
- Enter Details: Provide a valid email address and a secure password.
- Verify: Check your inbox for a verification email. You must click the link provided to activate your account.
- Log In: Once verified, you can access the “Add Server” and “Manage Listings” features.
How to List Your Own Windrose Server
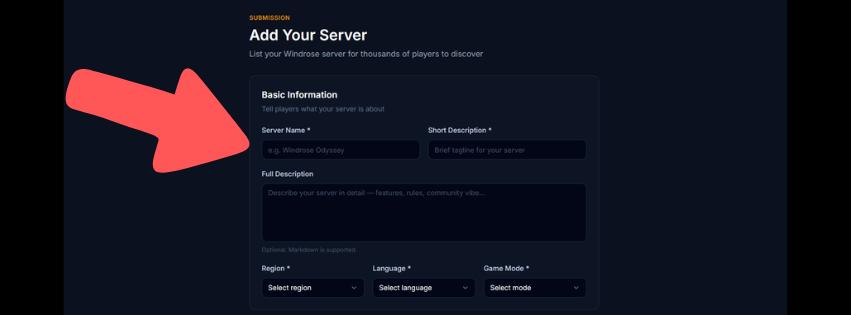
If you run a server, the Windrose Server List is your best tool for recruitment. To ensure high-quality listings, the platform requires several mandatory fields to help players find exactly what they are looking for.
Required Information for Submission:
To successfully list your server, you must provide:
- Server Name: The public title of your community.
- Short Description: A brief pitch explaining what makes your server unique.
- Region & Language: Essential for players looking for low-latency and clear communication.
- Mode: Identify if your server is PvE, PvP, or a specific custom variant.
- Maximum Players: Helps players understand the scale of the community.
- Invite Code: The most important field. Without an accurate code, players cannot join your world.
Finding the Perfect Match: Search & Filters
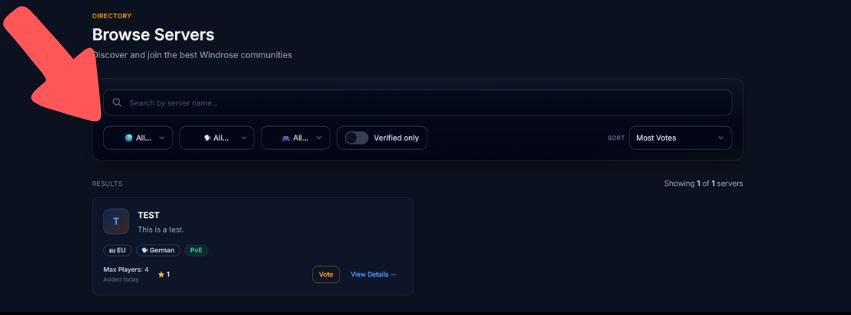
With a growing number of communities, scrolling through every entry can be time-consuming. The platform’s Search and Filter system allows you to drill down into the specifics.
You can narrow your search by:
- Name: If you already know the community you are looking for.
- Region: To find the best connection speeds.
- Language: To ensure you can communicate with your teammates.
- Verification: You can filter by Verified status to find servers that have been recognized for quality and reliability.
Joining a Server: Finding the Invite Code
Once you’ve found a server that interests you, joining is easy.
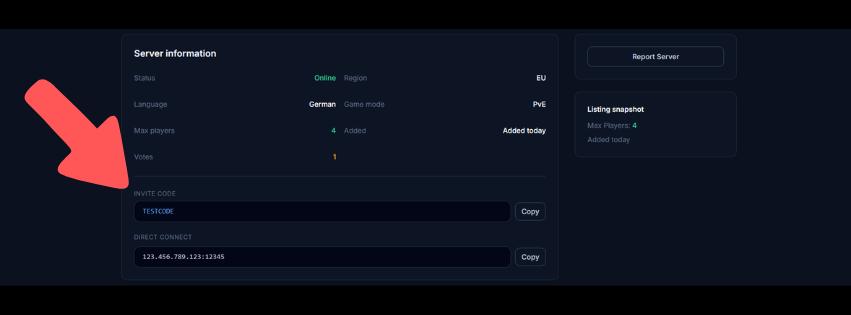
- Click on the server’s name to open its Detailed Page.
- Locate the Invite Code section on the page.
- Copy the code and use it within the Windrose game client to connect.
Pro Tip: Always check the “Maximum Players” count on the detail page to ensure there is room for you and your friends before you attempt to join.
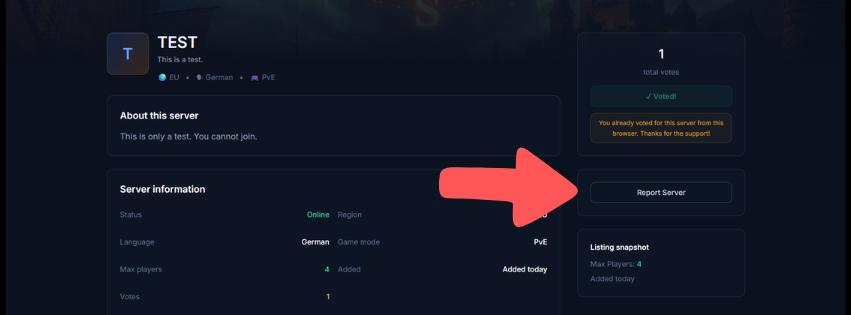
Community Moderation: How to Report a Server
To keep the Windrose Server List a high-quality resource, the platform relies on community feedback. If you encounter a listing that is broken or dishonest, you should report it.
When to file a report:
- The Invite Code is expired or incorrect.
- The Description is misleading (e.g., claiming to be PvE when it is PvP).
- The listing is Outdated or no longer active.
How to report: On the server details page, click the “Report Server” button. You will be prompted to enter a reason for the report. Providing a clear explanation helps the site administrators review the issue quickly and keep the list accurate for everyone.
Final Thoughts
The Windrose Server List is more than just a directory; it’s a community-driven tool that makes the game better for everyone. Whether you’re setting up your first server or looking for a new place to call home, these tools ensure you spend less time searching and more time playing.
Last Updated on May 1, 2026

An avid listener of music from a number of countries. Writing is his hobby and passion. A follower of all the latest android and PC games. Not to mention his favorite: Mobile Legends!